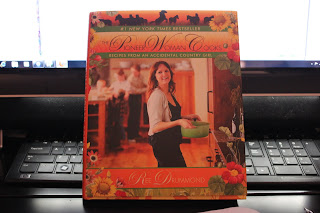
Here is the link to her blog: http://thepioneerwoman.com/
Unfortunately, my hands were WAY too full of stuff for me to photograph the meeting with The Pioneer Woman - but I did snap a few pic of the book:
Now, onto what I really came here to write about. Focus. I have been reading, and re-reading the little manual that came with my SLR. Only to find, each time, that I have totally forgotten what I just read in the section before, and how it fits in with the other section. Quite Frustrating. Indeed.
So I decided to pick one feature of the camera and work on it, until I feel I have enough of an understanding to move onto another part.
I chose focus.
In my point-and-shoot days, I did not think about focus much at all. Auto Focus and Face Recognition were right there, at the ready, preparing to give me a good shot every time.
My SLR also has Auto Focus, and the "Basic Zone" Modes that my point-and-shoot has. But it also has a whole different level of Auto Focus in the "Advanced Zone" Modes and, of course, the lenses can be set to Manual Focus. But lets be real - my eyes are not that good anymore!
So I stuck with an Advanced Auto Focus setting "ONE SHOT", and shot in Program AE mode and let the camera focus. And this is what I learned:
- "ONE SHOT" was the best choice for shooting at that moment because most of my subjects were stationary, so I had time to focus on each one.
- There are nine Auto Focus points, they can be chosen manually, but I chose to have my SLR automatically choose which focal point to use.
- The focal point with the closest subject, OR the group of focal points (using the center focal point as a guide) with the most consistent subject distance will be chosen as the focal points by the camera for focusing.
Focused in the Foreground:
Here is the where I was focused:
I positioned the center focal point over the branch that was closest (the focal point in red is actually the one that focused) and then the background was blurred.
Focused in the Background:
Here is where I focused:
In this photo I moved the center focal point away from the branch and onto the pavement below - and a group of focal points focused on this area, blurring the foreground.
Voila! Focus 101.
This was the ultimate experiment. I got the foreground and the background blurred, and the center in focus.
Here is where I focused:
I think I may be onto something!!
I will leave you with a few more photos from the farmers market:
Have a good week!
xoxo
Umm Nidal


Hmmm... Some of my example pictures are cut-off. Sorry! If you click on them, they will fully load.
ReplyDeleteHave to figure that out!
Umm Nidal
Firstly, WOW!!! You got to meet Ree Drummond!!! Excellent!!!
ReplyDeleteAnd secondly, you know I LOVE these photos! You ARE on to something!!! Ma sha Allah!!!
Salam. Wow, lovely pics again - specialy the one with the yellow flowers, so colourful
ReplyDeleteIt is so exciting i love the pictures and effects the colours at the farmers market are great mashaAllah! Looking forward to more!
ReplyDeletefinally getting to read your blog on a screen bigger than my iphone ;) masha'Allah well done you!! I look forward to seeing more.. I have a photography blog if you want an invite let me know. Although its more of pictures of me and my family and friends rather than fancy schmancy photos like yours :D Im awaiting a new posh camera for that one lol
ReplyDeleteI think the first photo (Branch) in my favourite, Simply because I love the combination of Macro/Bookeh, focus is good, and the colour came up brilliantly.
ReplyDeleteMay.